How to zip (compress) and unzip (extract) files in Linux VPS with examples
One of the most useful commands in Linux is the ability to zip (compress) and unzip (extract) the files and folders. We don’t fully understand how useful this really is. That is because honestly, we take the ability to zip and unzip files for granted. Most of the personal computers run Windows OS. And you can compress any number of files by right click and select send to compressed. Now imagine you have a full WordPress site hosted on a Linux VPS. And you want to move it to another location. It is a very simple task. But quickly becomes difficult without knowing how to zip (compress) and unzip (extract) files and folders in a Linux VPS. Today, I will show you all the different methods of compressing and extracting files in Linux using very simple commands. I am using a Ubuntu 18.04 LTS Cloud server from Vultr for this tutorial, but this should work on all Linux systems regardless of which operating system you have.
HOW TO ZIP (COMPRESS) AND UNZIP (EXTRACT) FILES IN LINUX VPS
I am using a Windows 10 computer as a client to connect to the Linux Cloud VPS using Putty as my terminal program. If you are also using Windows PC, I highly recommend you to use Putty to make the SSH connection. For Mac and Linux users, you can simply use terminal to connect to the server using the ssh command.
First of all, we need to connect to the Linux cloud VPS using Putty or Terminal. I won’t be showing you how to do it. If you have just bought a cloud VPS for the first time, the VPS company must have sent you an email about it.
Once you are logged into the server SSH, we can start typing in the commands.
How to unzip / Extract files in Linux
Step 1: Navigate to the right directory
The first thing you need to do, after login, is to find the .zip file. Basically, we will need to change our working directory to the folder which has our .zip file. And to do that, we use the command called cd, short for change directory.
For example, if I want to unzip or extract a file called word.zip. And this file is in the folder called public. I will need to open the public folder and then run the unzip command.
So, run the following command. replace path/to/folder with the actual folder path.
cd path/to/folder
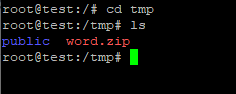
Step 2: Verify that the zip file is there in the folder.
You can do it by running the ls command. This is the list command, and it lists all the files and directories in the current working directory.
Step 3: Unzip (Extract) the zip file
This step can vary a little. Basically, if you want to unzip/extract the zip file in the current directory, then it is a simple command.
unzip word.zip
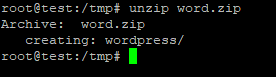
Don’t forget to replace word.zip with the actual name of the zip file.
Pro tip: If the file name is very long and complicated, you can type a few starting letters of the file name and then press the tab key. Many SSH clients, including putty, will auto-complete the name for you. This is a major time saver.
How to extract/unzip to a specific directory?
For example, you are moving a WordPress website and you wish to unzip extract the backup zip to the public_html folder. How do you do that? Well, it is very simple, all you have to do is add the destination directory at the end of the unzip command.
unzip word.zip -d /home/user/public_html/

-d option tells Linux that the directory after it is the required destination folder.
That’s it, you have successfully extracted the zip file. But what if you receive the bash: unzip: command not found error? This happens if your Linux system does not have the unzip command installed.
How to fix the bash: unzip: command not found error?
To fix this error, you will need to install the unzip command in your Linux system. You can do it by running the following command.
If you have Ubuntu or Debian based Linux distro, you will need to run the following command.
sudo apt-get install unzip -y
For RedHat, Fedora and CentOS based systems, you will need to run the following command.
sudo yum install unzip -y
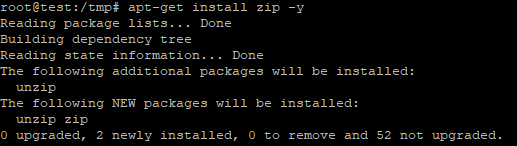
Don’t use sudo if you are using a root user. The -y argument is optional. It basically skips the verification prompt and runs the command without asking for verification.
Fun fact: When you run the command to install zip command, Linux will automatically install the unzip command as well.
Now you can run the unzip command again, and this time you should see that the zip is being extracted successfully.
How to unzip/extract a particular file from the zip in Linux?
Let’s say you want to only extract one particular file out of a .zip file. How do you do that? Well, it is very easy, let me show you how.
unzip zipfile.zip filename
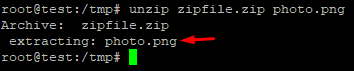
In this command, the zipfile.zip is the zip archive you already have. And filename is the file you wish to extract. So make sure to replace zipfile.zip and filename with actual names. Otherwise you will get an error.
How to Zip / Compress one file in Linux VPS?
Step 1: Navigate to the right folder
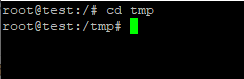
After you have successfully logged into the cloud VPS via SSH, you will need to go to the folder which has the file you want to zip/compress. For me this is the /tmp folder, so I will be running the cd command like this.
cd /tmp
Make sure to replace the /tmp folder with the actual path of the folder.
Step 2: Zip/Compress the file
Now simply run the following command in the terminal window and the file will be compressed.
zip zipfile.zip filename
zipfile.zip is the file name of the resulting zip archive file. For example, if I have a photo.png file and I wish to compress it as picture.zip, I will run the following command.
zip picture.zip photo.png

How to zip/compress multiple files in Linux?
To compress multiple files in a zip archive in Linux, you can run the following command in the terminal.
zip zipfile.zip filename1 filename2 filename3 …

Keep in mind that the zipfile.zip will be the resulting .zip archive which will have the filename1 and all the files in it.
How to compress/zip all files in a folder in Linux?
If you wish to zip all files in a folder using one command, it is very simple in Linux. Here I have an example command which you can use.
zip zipname.zip folder/*
And if you wish to zip/compress all the files in the current directory, use the following command.
zip zipname.zip *

The zipname.zip is the resulting zip archive. And the * tell Linux that you want to compress every file in the folder, and put it in the zipname.zip file.
How to zip/compress all files in a folder including sub-directories? (Recursive)
What if you want to compress not only the files in a folder, but also include all the sub-folders and their files as well in the zip archive? This is particularly helpful if you wish to create a full backup of all the files.
zip -r zipfilename.zip foldername
Make sure to change the zipfilename.zip to the actual name of the zip file you wish to have. This is the .zip file Linux will create. Don’t confuse it with a file you may already have. The -r attribute tells Linux that the zip command is recursive, and it needs to include all the sub-directories as well.
How to fix bash: zip: command not found error?
For those of you who are unable to run the zip command because of the bash: zip: command not found error, let me show you how to fix it. Basically, this error mostly comes when you have minimal Linux distro, instead of the full image. You can fix this by simply running the following command in the terminal.
For Ubuntu/Debian based systems, run the following command.
sudo apt-get install zip -y
And if you have Red Hat/Fedora/CentOS based system, run the following command.
sudo yum install zip -y
Don’t use sudo if you are using a root user. The -y argument is optional. It basically skips the verification prompt and runs the command without asking for verification.
Now run the zip command and it should start compressing the files with no issues.
Fun fact: You don’t really need to add the .zip file extenstion when using the zip command. It is only used for the understanding of our human minds. When you will run the zip command, it will automatically add .zip extension to the first name after zip.
That’s it, now you know how to zip (compress) and unzip (extract) files in Linux (VPS) using the SSH terminal commands. If you liked this tutorial then make sure to share it with others and also don’t forget to follow us on twitter for more tutorials like this.