Setup private cloud for $15 per year – 100GB space
Today I will show you how to setup private cloud for $15 per year. This is a super cheap solution which will give you 100GB cloud storage for $15 per year. What you’ll require is just a cloud VPS which I will tell you how you can buy for $15/yr.
To create private cloud, you need following things.
- Windows PC , Mac Computer or Android device. We’ll use this to make connection with our server.
- A VPS from any Provider. I am using Crissic Solutions because it offers 100GB storage in $15 for 1 year. No increase on renewal. Here is the link.
- 20-30 minutes of your time because it is a time taking procedure of make “private cloud”.
- A cup of tea of coffee, as you like.
How to make private cloud for $15/yr
For this tutorial we are going to use owncloud 8, which is an open source application which has the ability to turn your VPS into a full fledged Private Cloud. We’re using Debian 7 as our operating system and you should also do the same.
You many also like:
- 10 amazing facts about the internet
- Denial of service attach from your Android device
- Find all domain names registered by someone
Just follow the steps given below and you would be all gold.
[sociallocker]
- Login to your vps as root. Click here to find step by step guide for this.
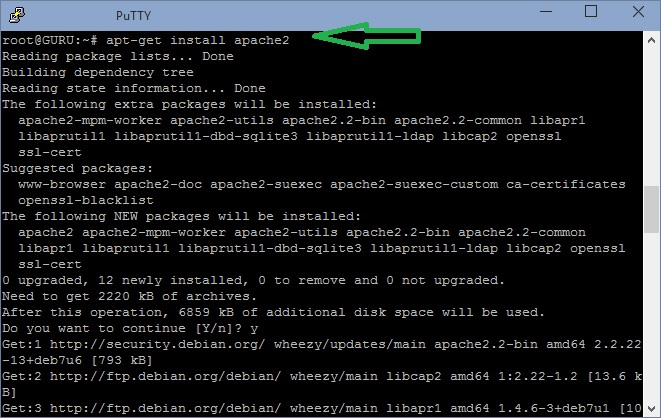
- First of all you need to install Apache2 web server. If you already have a webserver in your VPS, you can skip this command.
apt-get install apache2

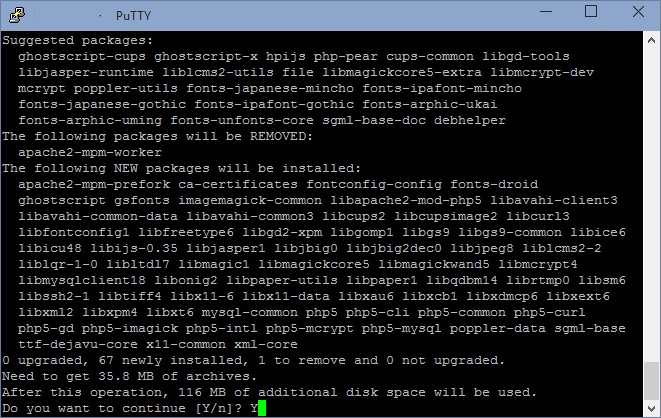
- Now you have to install php and some other extensions that are required by owncloud. if you already have these extensions installed, skip this as well. But I recommend you to run this command because it doesn’t hurt.
apt-get install php5 php5-mysql php5-gd php5-json php5-curl php5-intl php5-mcrypt php5-imagick - Now we’ll install MySQL Database server cause our owncloud requires a SQL database to operate properly.
apt-get install mysql-server - By default, MySQL doen not get installed with any password. Execute the following command. Set a hard-to-guess root password and remove anonymous access to mysql.
mysql_secure_installation - After setting the MySQL server, you need to create a SQL database and a username. execute the following commands 1 by 1 to accomplish the same.
mysql -u root -pDon’t forget to change
Enter password:
mysql> CREATE USER 'ownclouduser'@'localhost' IDENTIFIED BY 'YOURPASSWORD';
mysql> CREATE DATABASE ownclouddb;
mysql> GRANT ALL ON ownclouddb.* TO 'ownclouduser'@'localhost';
mysql> FLUSH PRIVILEGES;
mysql> exitYOURPASSWORDwith your actual password,ownclouduserwith your actual user andownclouddbwith your actual database name - Next you have to install zip and unzip applications if you don’t already have these.
apt-get install zip unzip - Now we have to download the latest version of owncloud which is 8.1.1 at the time of writing this. Copy these commands and it will download, extract and move the data to web directory.
cd /tmp

wget https://download.owncloud.org/community/owncloud-8.1.1.zip

unzip owncloud-8.1.1.zip

cd owncloud

mv * /var/www/html/owncloud - Next we’ll set the permissions of the directory so we can access the directory via web browser.
chown www-data:www-data -R /var/www/html/owncloud/ - Now we’ll setup apache server so it recognizes out owncloud directory and we are able to access it directly. from where ever we want.
# nano /etc/apache2/sites-available/owncloud.conf
<IfModule mod_alias.c>
Alias /owncloud /var/www/html/owncloud
</IfModule>
<Directory “/var/www/html/owncloud”
Options Indexes FollowSymLinks
AllowOverride All
Order allow,deny
</Directory> - Restarting apache server.
service apache2 restart - Now you can access your private cloud via the following address.
http://yourserverIP/owncloud
[/sociallocker]
Why private cloud instead of public?
- Only you will have access to your files, just don’t share your server IP address with anyone.
- You can use your VPS as a web hosting space which you cant do with other cloyd storages.
- You can run as many services as you like, ftp, sql, apache, php and many more.
- If you have security concers, then this setup is not for you. I don’t take any responsibility of data theft.
If you liked our effort and found this post hhelpful, please share it with others and help us spread the word.