How to transfer files to iPhone via Wi-Fi – No USB needed
Recently I was in a situation where I needed to transfer some files from my friend’s computer to my iPad. I was not carrying lightning with me and he didn’t have it because he is android user. Then I had to transfer files from his computer via WiFi. Transfer speeds were not that great but it did the job pretty well. Today I will tell you how exactly I did it and how you can transfer files to and from your iPhone without needing the lightening cable.
How to transfer files to iPhone via Wi-Fi
Now if you are a Mac user, you might be thinking that it is really easy via AirDrop but I am going to show you how you can do the same on your windows PC.
Pre-Requisites
If you are regular reader of Revkid.com then you should have an idea and that I don’t like to talk BS and that is exactly I am doing today. For Pre-Requisites you require a few things sorted out to get this job done without hickups.
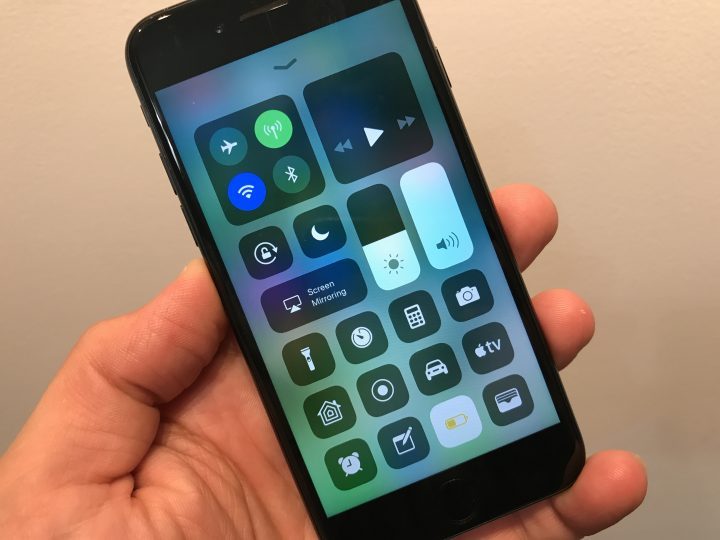
- You do require jailbreak on your iOS device and if you don’t have jailbreak then you should do it right now by following this guide.
- Both the PC and your iOS device should be connected to the same Wi-Fi Network. Pro Tip: If your PC is connected via LAN, the transfer speed will be better than both being on Wi-Fi.
- Internet connection on your iPhone, As I mentioned before This guide should work smoothly on iPad and iPods as well because I myself did it on my iPad and it worked.
How to transfer files on iPhone via Wi-Fi
- Make sure you are connected with internet. Both Mobile Data or Wifi will do.
- Open Cydia app and tap on Search button. You should see a white screen with a search bar on top.
- Search for Automatic SSH and install it. The cool thing about SSH is that the connection between your iPhone and PC will be encrypted. OpenSSH is also required to be installed and it should have been already installed with automatic SSH.

- Respring your iPhone/iPad/iPod Touch and it will be ready to accept SSH connections.
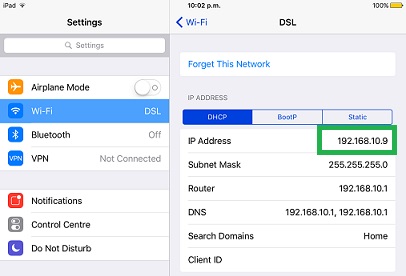
- Go to Settings app on your iPhone and Open Wi-Fi settings. Now tap on the network you are connected with and Note Down the IP Address. You will be needing it pretty soon.

- Now We have to install WinSCP on the PC so that it can communicate with your iPhone/iPod/iPad. Click here and download WinSCP setup and install it on your PC. The installation process is very much straight forward. Open the Exe file and then Do Next, Next, Agree and Install.
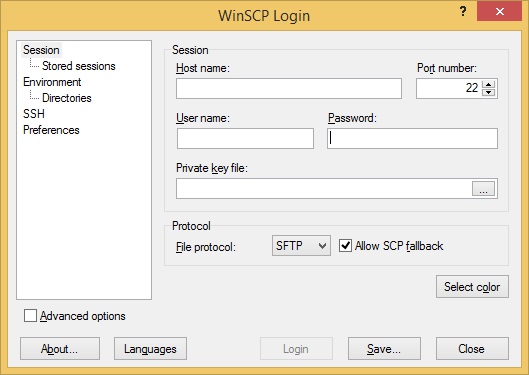
- After you have installed WinSCP, Open it and you should see a windows like the one shown below.

- Enter IP Address of your iOS device in the Host Name field.
- Username is “root” without quotes and password is “alpine” which you MUST CHANGE.
- Once you have all the credentials entered correctly, click Login button and you will see this a Pop-up asking whether you want to save the session, just make your choice.
- Now you will see your iPhone’s files and directories on your PC.
- Now you can Simply Select, Drag and Drop the files you want to transfer and it should go smooth.
- Make sure you change the password. A Step-by-step guide to changing the default OpenSSH password is linked here.


Pro Tip: SSH Stands for Secure Shell which is designed for command line interface but we will be transferring files via SSH. Cool huh?