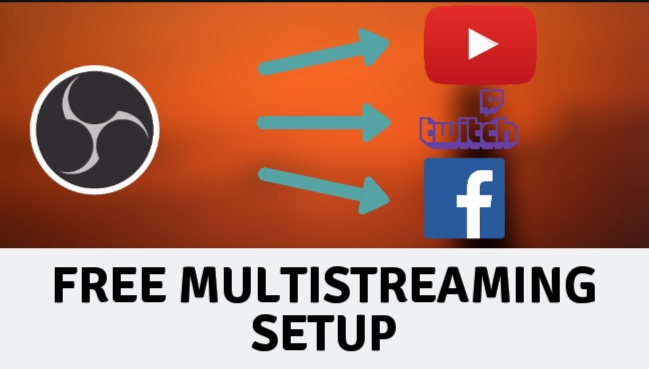
Multi Stream on VPS – Stream to Twitch, YouTube & Facebook Simultaneously with RTMPS Support
In this tutorial, I will show you how you can multi stream to Twitch, YouTube & Facebook at the same time with RTMPS Support. Also, if you do not have enough upload bandwidth to broadcast to all services, I have also made the same tutorial for a VPS. Which costs $3.5/month and solves the problem of having low internet bandwidth.
If you are live streaming to Twitch, YouTube or Facebook, and you have thought of streaming to more than one streaming services, you must have looked at ReStream.io. Basically, it is a premium service which allows you to broadcast your live stream to more than one platforms at the same time. This helps you reach more viewers and gain following on multiple platforms. If you are making money from your live streams then it makes sense to invest in a premium service like ReStream, but what if you are just starting and you don’t have enough funds to purchase a premium service yet? Well, this is where I come in. I have made this guide for you, so you can live stream to more than 1 live streaming platforms at once for free. Doesn’t matter if it is Facebook, YouTube, Twitch.tv, Periscope or any other platform, as long as it provides you an RTMP live streaming link, you should be good to go.
MultiStream for FREE – Live Stream to Twitch YouTube & Facebook Simultaneously
Disclaimer:
Just keep in mind that you will have to mind your Internet upload speeds while using this method. Let’s say that you are broadcasting 1080p stream to Twitch.tv at 6000kbps and your internet is only 10mbps up, you will need to reduce the bitrate to 3000kbps if you are going to stream to two services. Even if you dont have enough internet bandwidth, you can setup this same restreaming system on a $3.5 per month VPS, which is still way cheaper than restream.io which costs $16 per month.
Why do I recommend the VPS method?
I have found some linux tricks to bring the VPS cost down to less than $1/month. Which means you can use the VPS method even if you have more than enough internet uplink bandwidth. Because unlike the Windows method, using a VPS does not have any performance impact on your computer.
How it works
To understand how it works, you will need to understand how ReStream.io works. Currently, you are using streaming software like OBS or XSplit. This program is encoding the video feed and broadcasting to 1 platform. When you subscribe to a ReStream.io account, you will be streaming to ReStream.io and then setup the ReStream.io server, so it can push the same stream to multiple platforms.
In other words, it works as a relay to push single live stream towards multiple services. And this is exactly how we are going to setup our own DIY Re-Streaming program.
Instead of pushing the stream towards a remote server, i.e. ReStream.io, we will push the live stream towards a program which is running on our own computer.
Prerequisites:
Before we start setting up the Re-Streaming service, we need to make sure to have a couple of things handy. Some of these are required while the rest is recommended but are not mandatory.
Streaming Software
If you are already live streaming, you will probably have OBS Studio, Stream Labs OBS or XSplit. It doesn’t matter which one you have. You will need a streaming program, I will be using OBS Studio because it is free, open-source and easy to use.
Stream Keys and RTMP(s) URLs
The other thing required for this process is the Stream URLs and Stream Keys of the services you want to stream to. You can find these in the live streaming dashboard of each platform, i.e Facebook. Please keep in mind that the stream key is like a password for live streaming on your page/channel. So, do not share it with anyone. Whoever has it, can live stream to your page/channel on your behalf.
Notepad++
This is not required but I highly recommend that you get it. Because it makes editing the files very easy and convenient. It is a free program that you can download from here.
Re-Stream live Streams to Multiple Platforms – Windows Tutorial (FREE)
- First of all, you will need to check your internet connection speeds. If you already know how much upload speeds you get, you can skip this step. You can use speedtest.net to get an estimate of your internet bandwidth.

- Now download the latest version of Nginx with RTMP module on your computer, for me it is version 1.17.8.1.
- Extract the zip file.
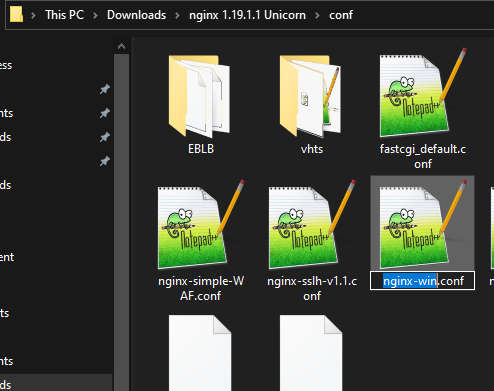
- Open the conf folder and rename nginx-win.conf to nginx.conf.

- Edit the nginx.conf file with Notepad++. You may use the standard notepad or any other text editor.
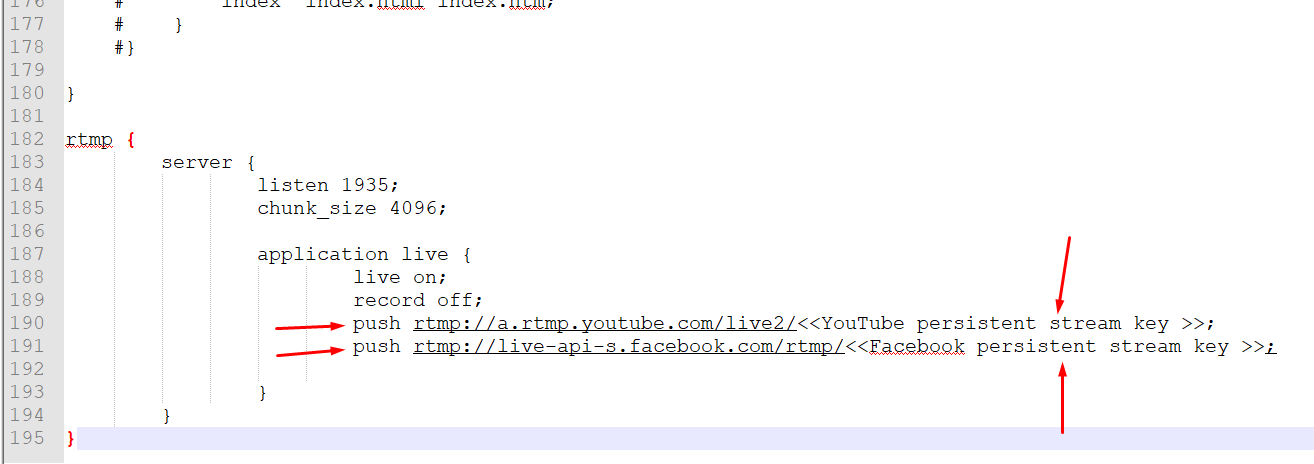
- Scroll down to the bottom of nginx.conf file and paste the following code.
rtmp {

server {

listen 1935;

chunk_size 4096;

application live {

live on;

record off;

push rtmp://a.rtmp.youtube.com/live2/<<YouTube persistent stream key >>;

push rtmp://live-api-s.facebook.com/rtmp/<<Facebook persistent stream key >>;

}

}

} - These are from the streaming platforms that you will be streaming to. The format or syntax is the most important here. This is how you will need to enter your stream keys.
push rtmp://streamURL/streamkey;
- I recommend you to change the application name from
liveto something which is easy to remember and hard to guess. - Once you have it all set up, save the config file and then run the nginx.exe file.
- A command line window will show up. Don’t close this window and minimize it.
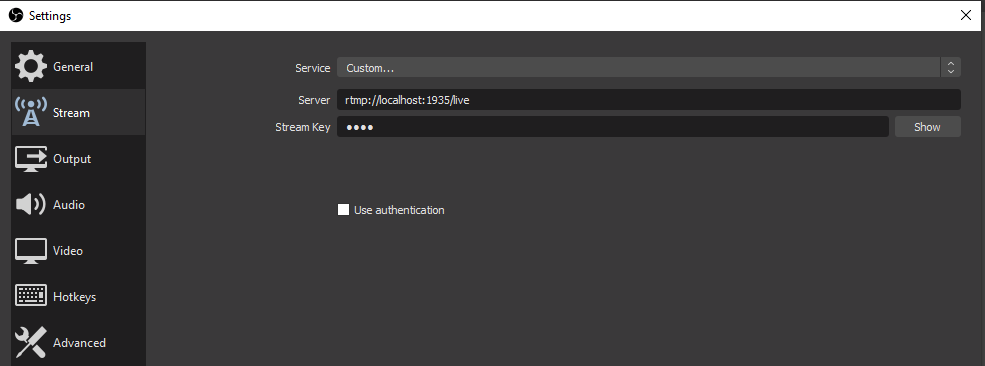
- Now you can open OBS or XSplit and edit the streaming settings.
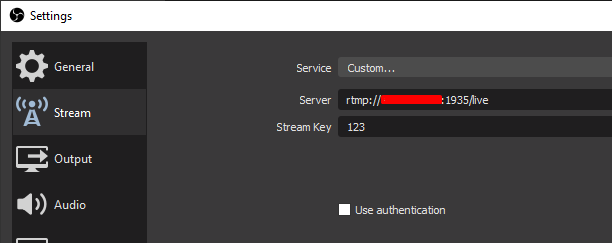
- Here set the stream URL to the following URL and save the settings.
rtmp://localhost:1935/live/

- You can use anything in the stream key. It does not matter.
- Also make sure to reduce the streaming videos bit rate so you have some head room after multiple live streams are being uploaded. For example, if you have 20 Mbps upload bandwidth and you are streaming to 3 platform at the same time, you should set the bit-rate to less than 6000 kbps.

How to enable RTMPS support on Windows Nginx?
Recently, Facebook has decided to stop the support of RTMP ingest and move to RTMPS entirely. It was a gradual transition from RTMP to RTMPS. Now you can not use the above tutorial to stream to Facebook. Here I have some steps which you can follow to enable RTMPS support on Windows Nginx. I have tested it and it works fine.
To Enable RTMPS support on Windows, we will be using a program called Stunnel. This program allows us to encrypt the RTMP traffic in an encrypted tunnel and send it to the Facebook servers.
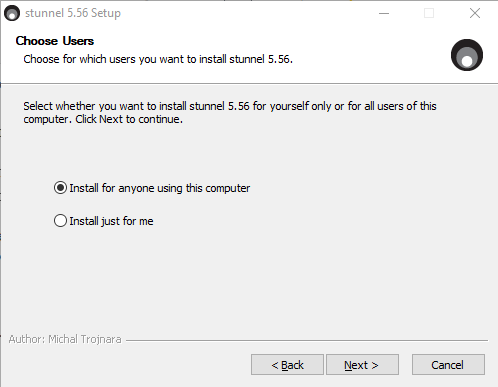
- First of all, download the latest version of Stunnel on your Windows PC from their official website.
- Install it on your Windows PC, and follow the on-screen instructions. Choose install for anyone using this computer.

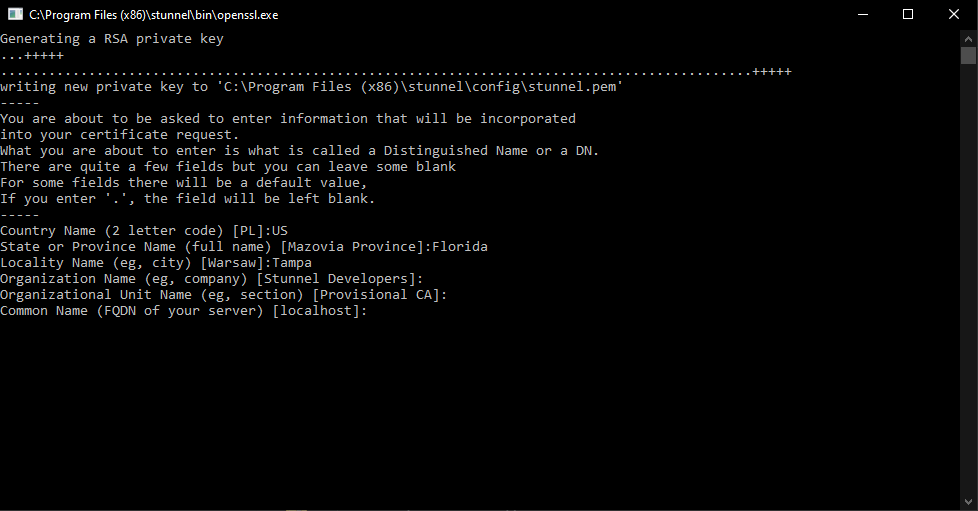
- It will ask you to enter some details about you. Enter the details to your best knowledge and skip the steps which you don’t know about. You can skip by pressing the Enter key.

- Once the installation has finished, go to C:\Program Files (x86)\stunnel\config\ and open the stunnel.conf file in notepadd++
[fb-live]

client = yes

accept = 19350

connect = live-api-s.facebook.com:443

verifyChain = no
- Scroll to the bottom of the file and add the following code at the end.
- Save the stunnel.conf file and start the Stunnel program. If you have it already running, you can exit it and start it again.
- Now go back to the Nginx directory and open the conf folder. And open the nginx.conf file in the Notepad++
- Here you will need to make some changes to the Facebook push line.
Replace thepush rtmp://live-api-s.facebook.com/rtmp/<STREAMKEY>
to
push rtmp://localhost:19350/rtmp/<STREAMKEY>

- Save the nginx.conf file and restart the Nginx server.
- Now you can start the live stream and it should work on Facebook as well.
How to multi stream using Nginx RTMP module on Linux VPS with RTMPS support? (Recommended)
I am using a linux VPS from Vultr.com to make this tutorial and I highly recommend you to use their service. You can use my affiliate link to signup and get $100 in free credit to test their service for 30 days. They have several features which really helps reduce the cost and increase security of multi streaming setup. After all, nobody wants to have someone gain access to your stream keys and start streaming something fishy to your audience.
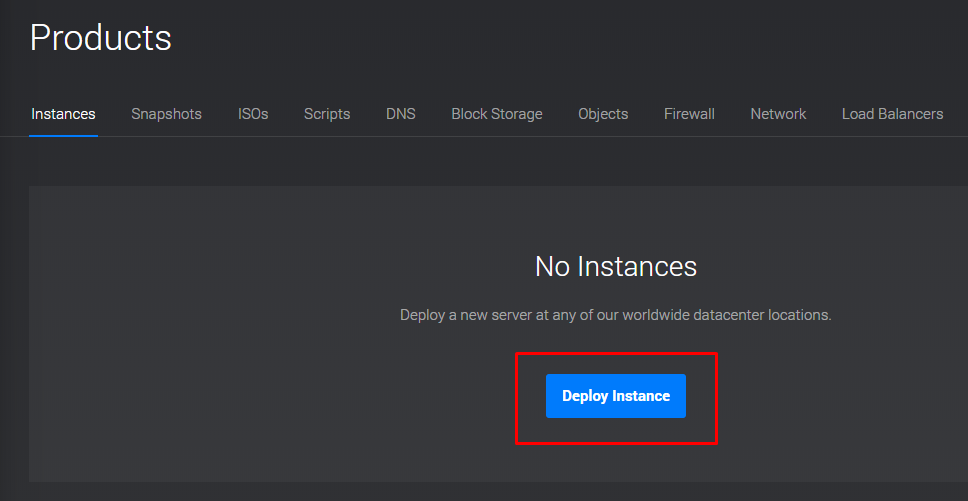
- Once you have registered your account with Vultr and have setup your payment method, click on the Products tab.
- Click “Deploy Instance”

- Select “Cloud Compute” and scroll down.
- Choose the location which is closest to you. For me, it is the Miami region in the USA. This step does not really matter. Sometimes the cheapest plans are not available in the region of your choice. Feel free to choose a different region.

- Under Server Type, choose Ubuntu 20.04 x64.

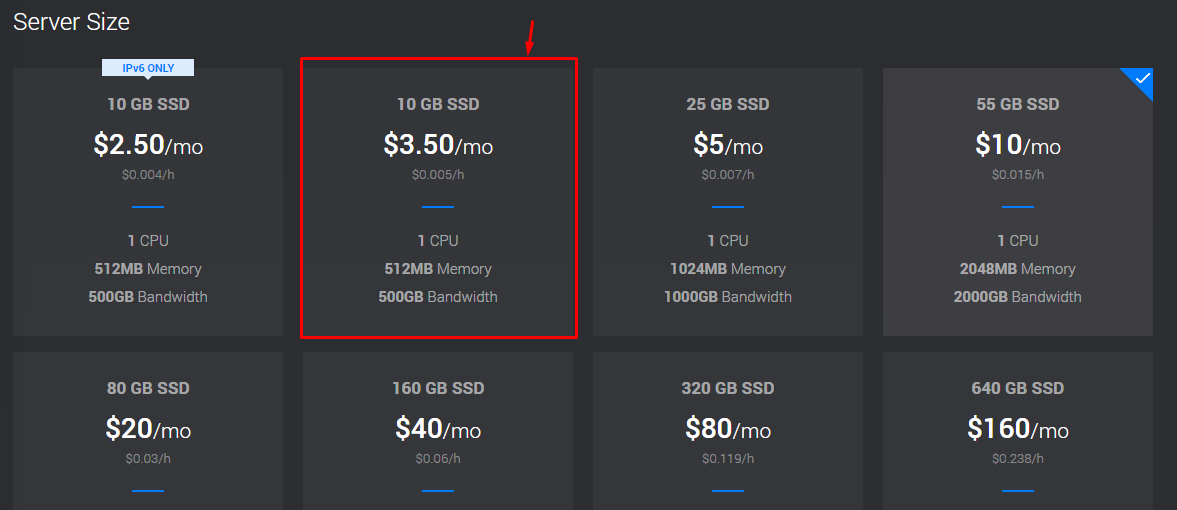
- Select the smallest server size with IPv4. We do not want a server with IPv6 only.

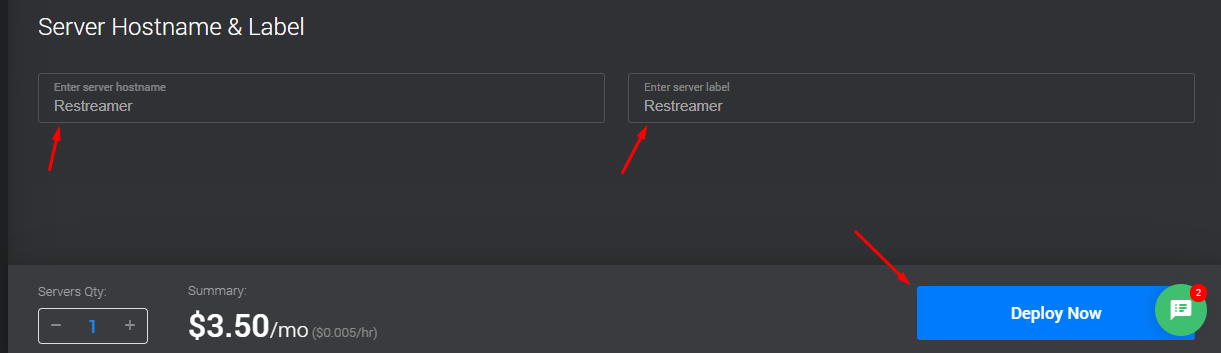
- Scroll down, give your server a hostname and label. And then click on Deploy now button.

- Wait for a few seconds while your VPS is being deployed. It usually takes less than a few minutes.
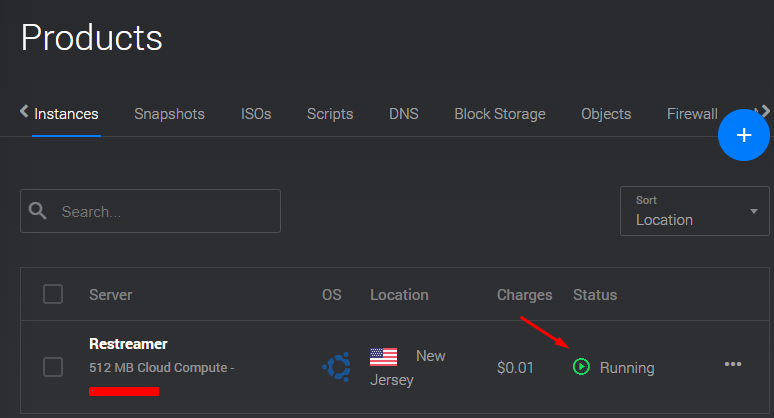
- Once the VPS is deployed and the status is showing as “Running”, we can proceed.

- Click on the instance name. Copy the IP address and the Password to a text file.
- Login to the VPS using a terminal program. I like to use putty, which is light and works well on my Windows PC.
- Once you are logged in, run the following command to update all the packages. Usually Vultr is very good at keeping their Linux images up to date, but it is never a bad idea to make sure.
apt update && apt upgrade -y - Now run the following command to install the Nginx server on the VPS.
apt-get install nginx -y -
Next, we need to install the rtmp module to use it as a restreaming VPS.
apt-get install libnginx-mod-rtmp -y - Now run the following command to open the nginx configuration file.
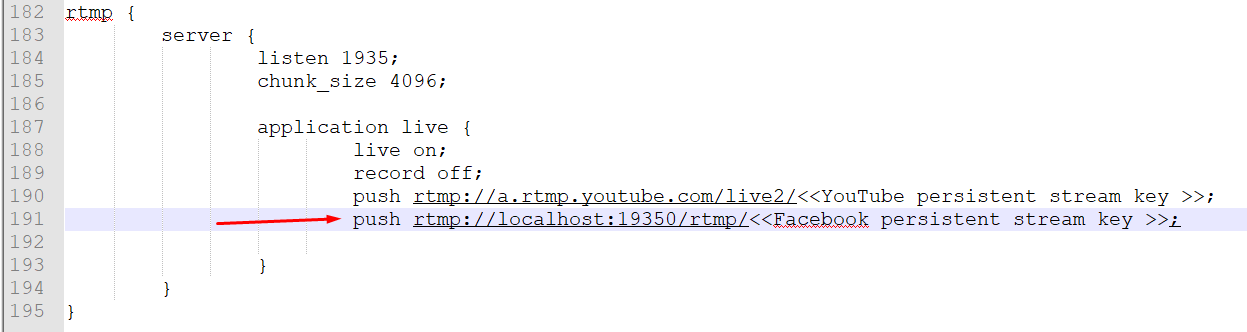
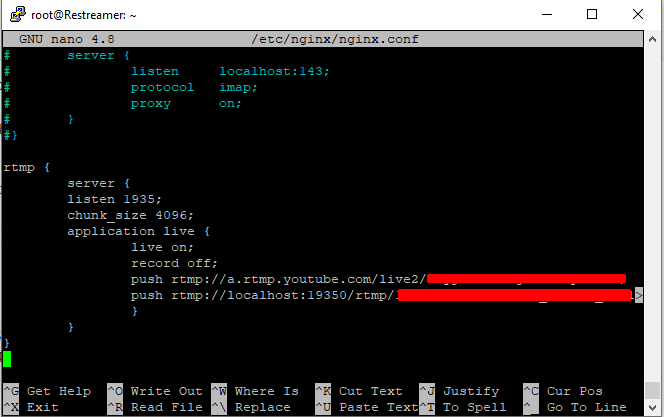
nano /etc/nginx/nginx.conf - Scroll down to the very bottom of the file and paste the following code in it. I have YouTube and Facebook URLs in the push section. Don’t forget to change it to your own stream keys and URLs.
rtmp {

server {

listen 1935;

chunk_size 4096;

application live {

live on;

record off;

push rtmp://a.rtmp.youtube.com/live2/<<YouTube persistent stream key >>;

push rtmp://localhost:19350/rtmp/<<Facebook persistent stream key >>;

}

}

}

- Save the file by pressing Ctrl+X then pressing Y and then pressing the Enter key.
- Restart the Nginx server using the following command. If you setup everything right, you should not see any errors in the putty terminal window.
systemctl restart nginx - Now we need to install the Stunnel utility on our VPS. This will help us enable the rtmps support for Facebook live streaming.
apt-get install stunnel4 -y - Edit the Stunnel configuration file using nano editor.
nano /etc/default/stunnel4 - Find the line ENABLE=0 and change it to ENABLE=1. You might not find it in the file, in that case simply add the ENABLE=1 line at the end of the file and save it using CTRL+X and Y and then press Enter.

- Now edit the configuration file of stunnel to add the Facebook live URL. Enter the following command.
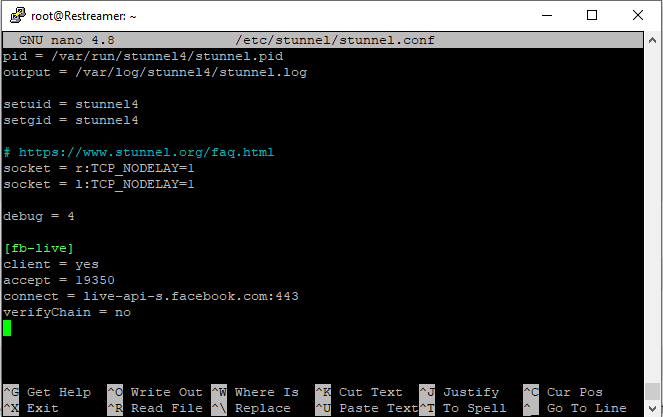
nano /etc/stunnel/stunnel.conf - Add the following code in the file and then save it by pressing CTRL+X, Y and then Enter.

pid = /var/run/stunnel4/stunnel.pid

output = /var/log/stunnel4/stunnel.log
setgid = stunnel4
socket = r:TCP_NODELAY=1
socket = l:TCP_NODELAY=1
client = yes
accept = 19350
connect = live-api-s.facebook.com:443
verifyChain = no - Enable auto start for Stunnel by running the following command.
systemctl enable stunnel4.service - Enable auto start for Nginx by running the following command.
systemctl enable nginx - Lastly, restart the stunnel service by running the following command.
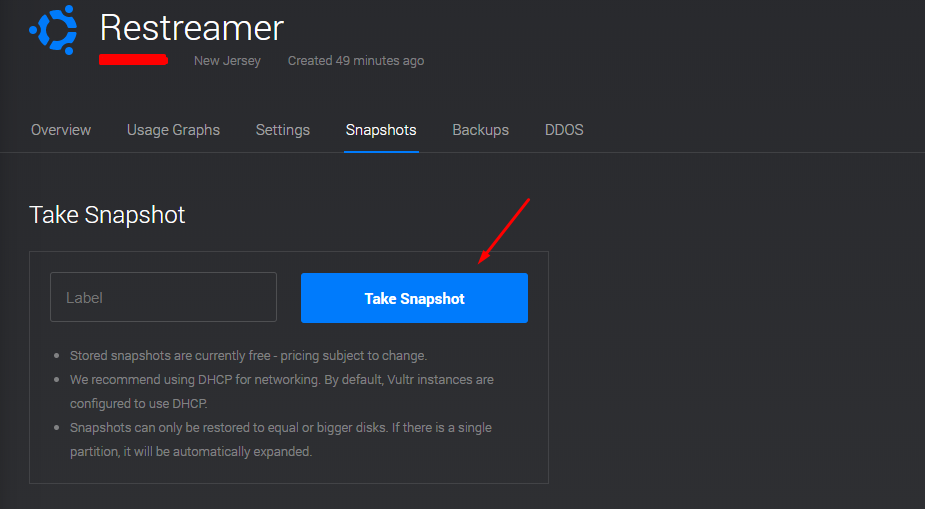
systemctl restart stunnel4.service - You can now start streaming but the last thing I would recommend you to do it take a snapshot of your VPS in the Vultr dashboard. Wait for a few minutes until the snapshot is shown as available.
 This will help you save a lot of money, because you will be able to deploy it on demand and start streaming by simply updating the IP address in the OBS settings.
 - Keep in mind that you will need to use this stream URL in the OBS settings. And the stream key can be set to anything.

rtmp://<<VPS IP>>:1935/live


That’s it for this quick tutorial showing you how to multi stream for free and why you do not need ReStream.io to broadcast your live stream to multiple platforms simultaneously. If you liked this tutorial and found it to be helpful then make sure to share it with others. If you are facing any issues, feel free to drop them below and I would love to help you. Also don’t forget to follow us on Twitter for more tutorials like this.